Saving and Retrieving Measurements
Saving measurements with the matoha app:
The functions of the control buttons:
Using the saving menu in the Matoha app:
Step 1 - Create a collection
Collections are folders for you measurements (spectra). Create a collection or use a pre-existing one.
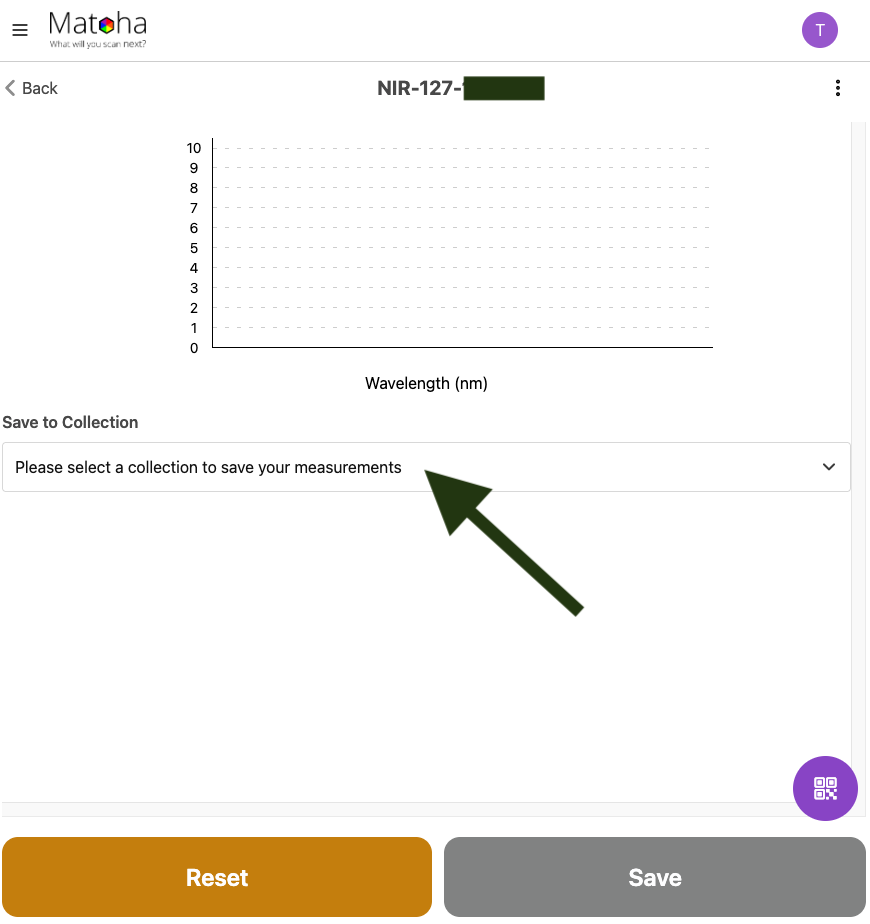
Step 2 - Connect to a machine
Phone/Tablet version | Desktop version |
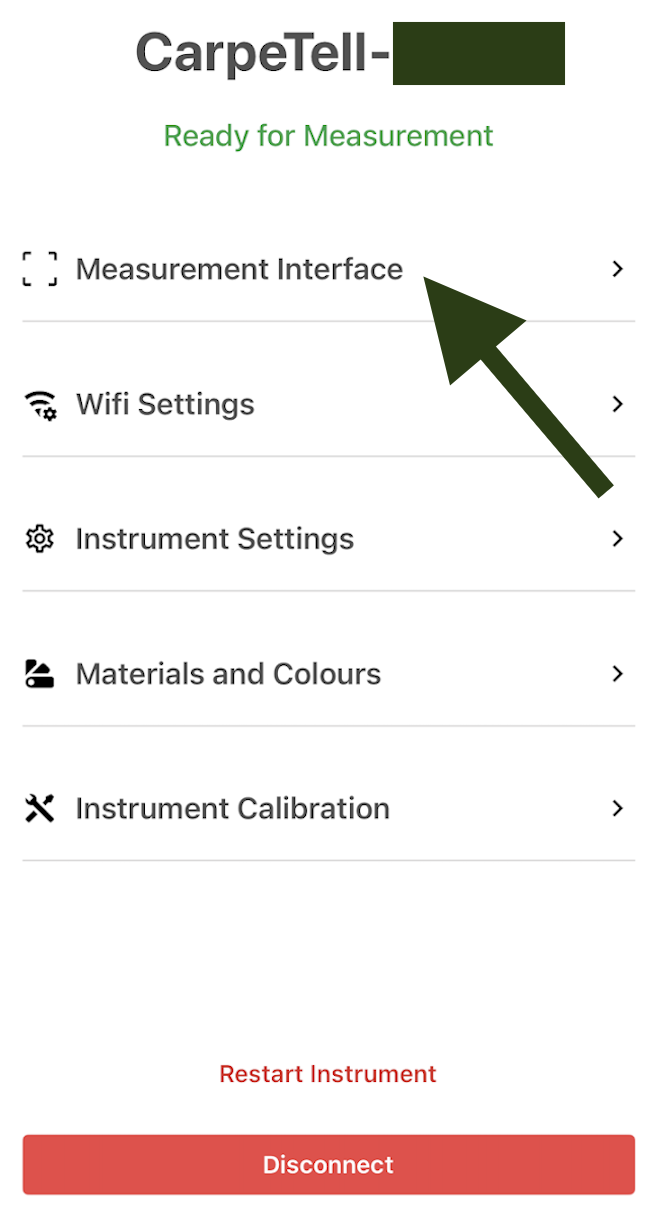
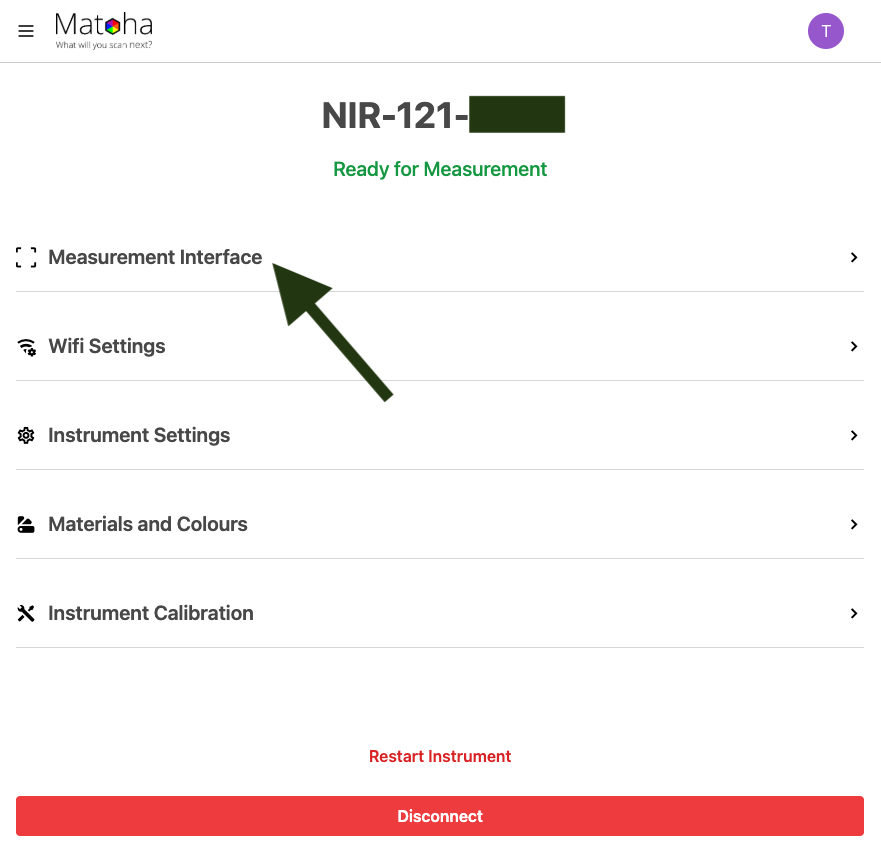
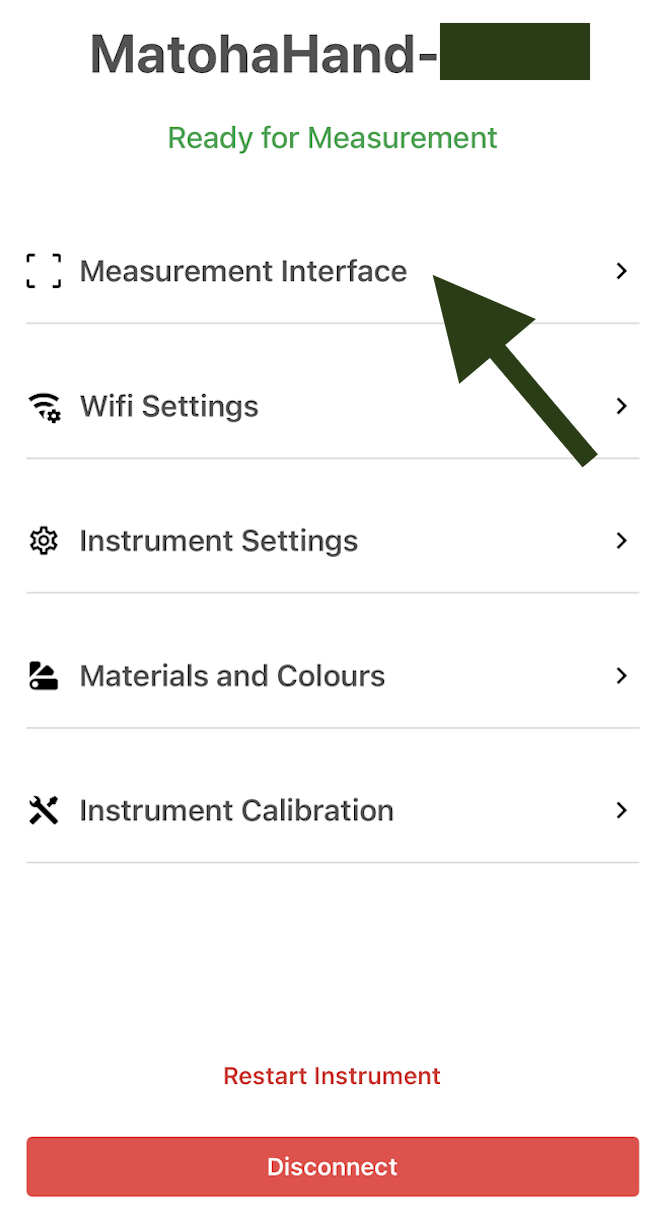
Connect to a machine and after you have successfully connected, select "Measurement interface".
| Connect to a machine and after you have successfully connected, select "Measurement interface".
|
Step 3 - Measure a sample and add it to your collection
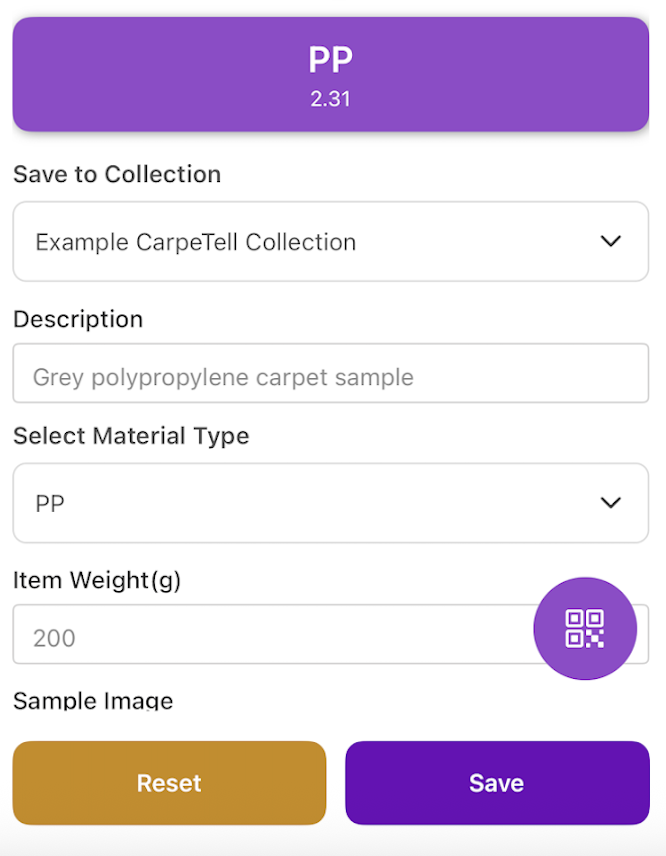
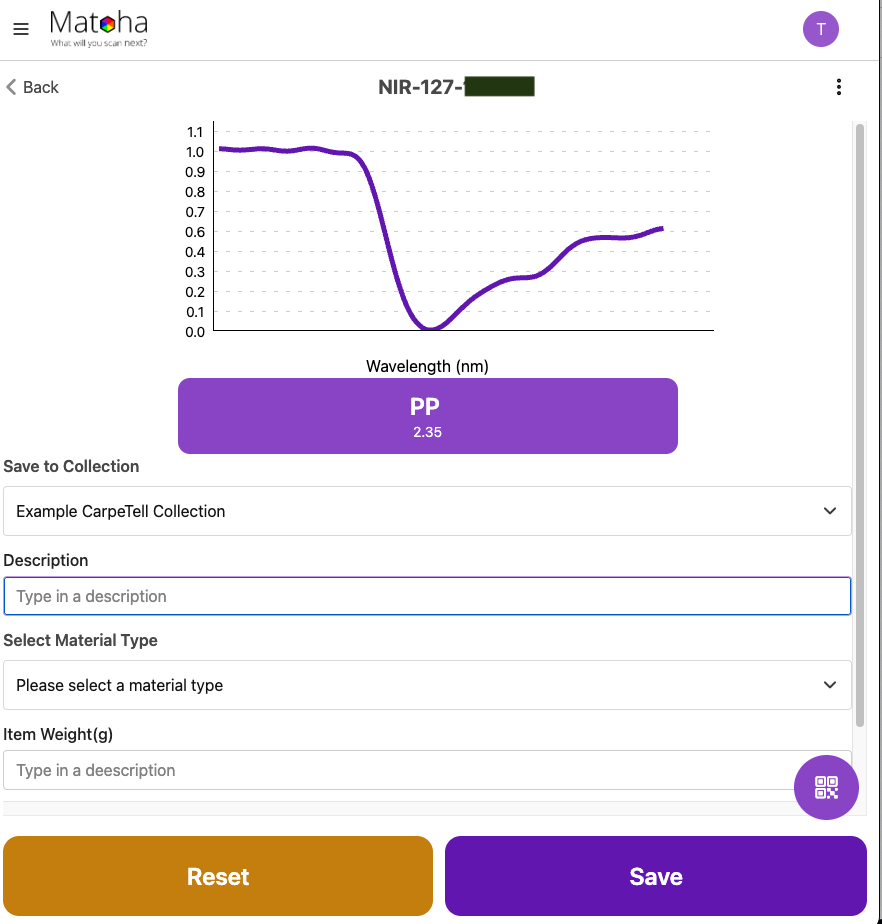
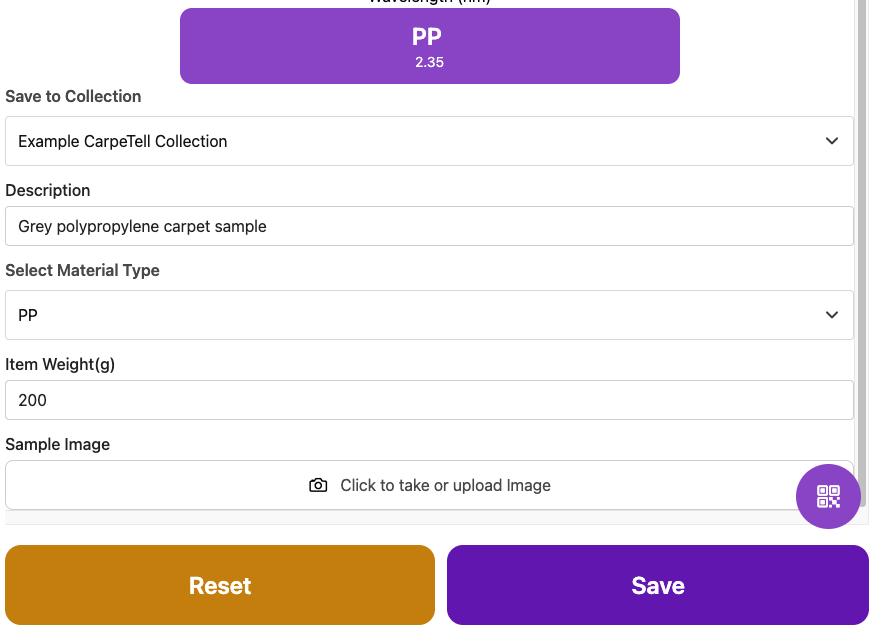
For PlasTell and CarpeTell:
Phone/Tablet version | Desktop version |
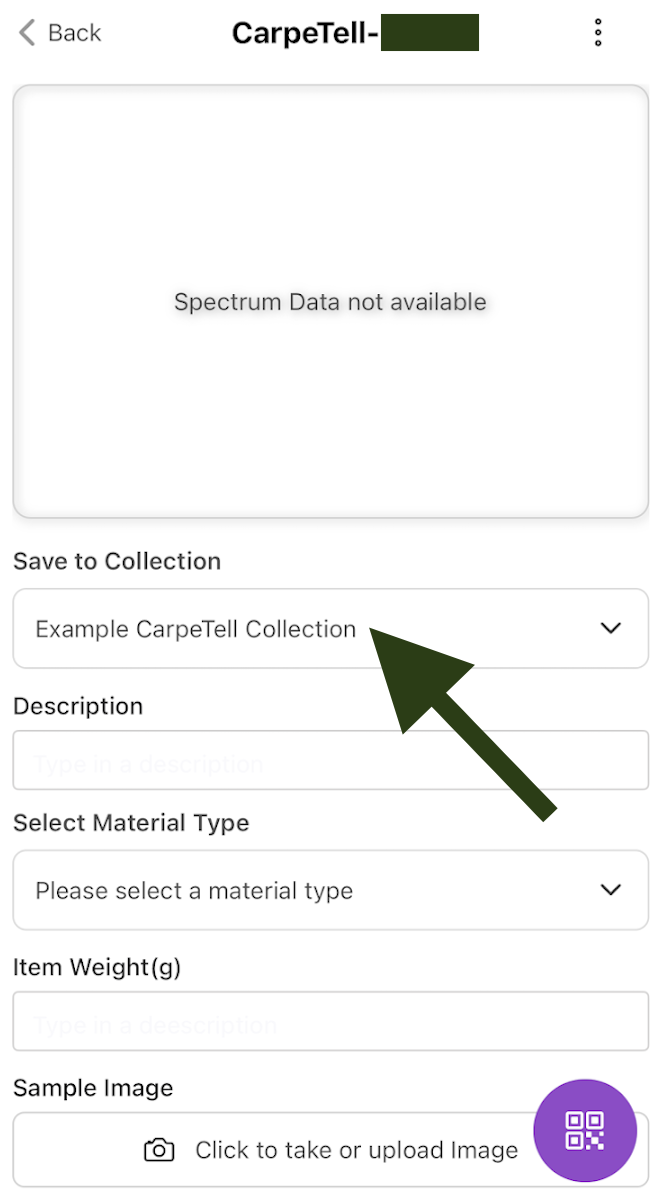
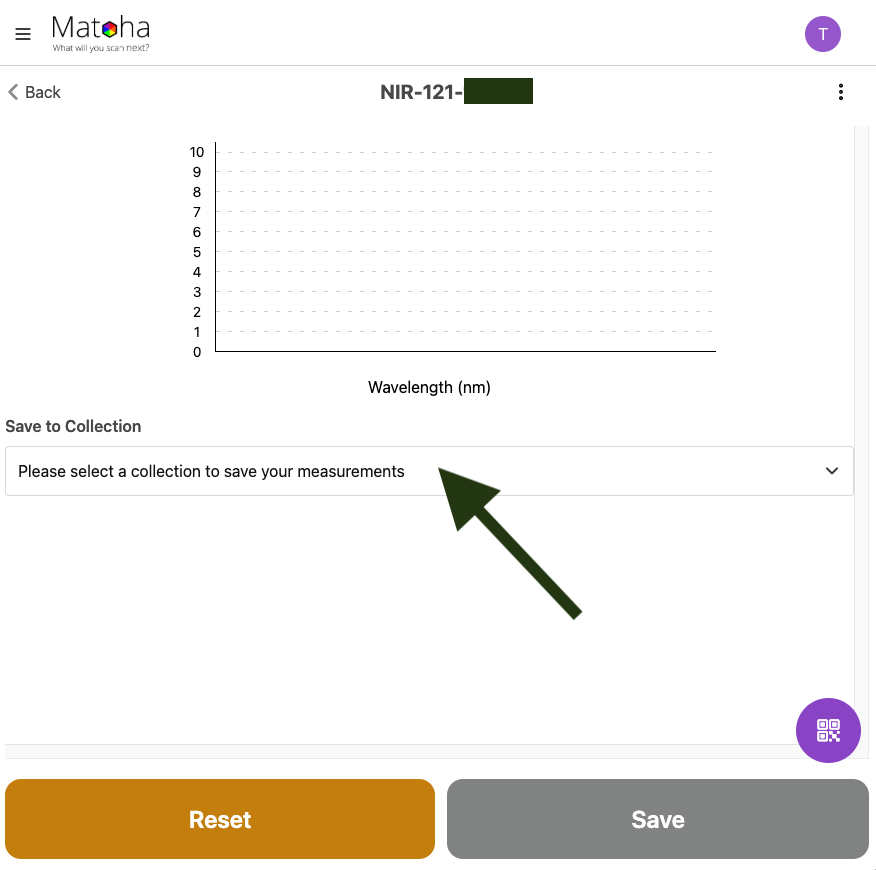
1.Select your collection (or create a new collection).
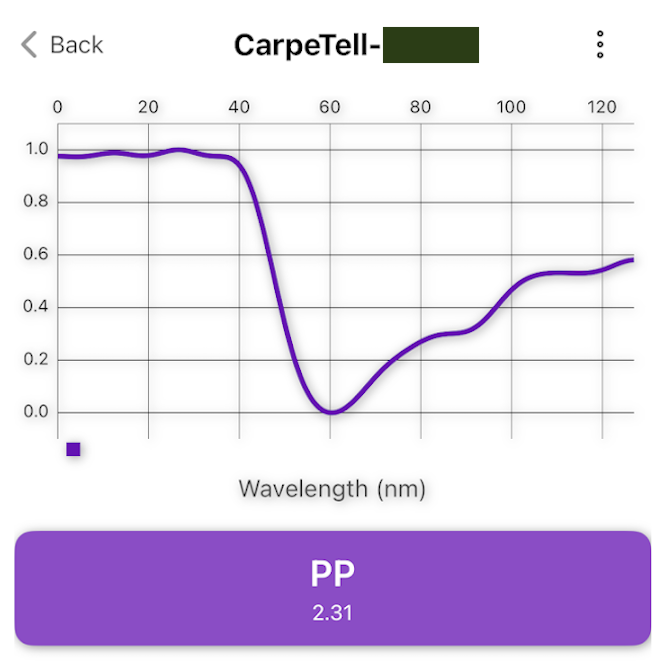
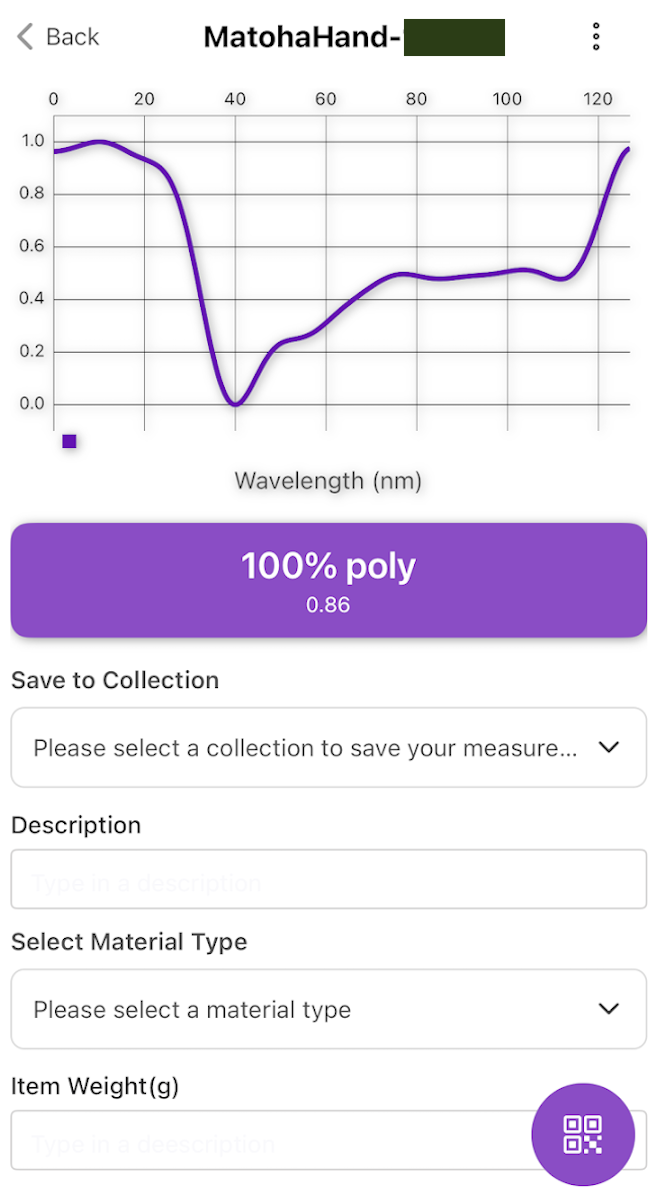
2. Measure your sample, the result of your measurement will appear on your device screen and your spectrometer screen.
3. If required, enter any other relevant information about the sample, such as the material or description.
4. Press "Save" - this uploads the measurement into our cloud where it is securely stored. You can now measure further samples. | 1.Select your collection (or create a new collection).
2. Measure your sample, the result of your measurement will appear on your device screen and your spectrometer screen.
3. If required, enter any other relevant information about the sample, such as the material or description.
4. Press "Save" - this uploads the measurement into our cloud where it is securely stored. You can now measure further samples. |
For FabriTell:
Phone/Tablet version | Desktop version |
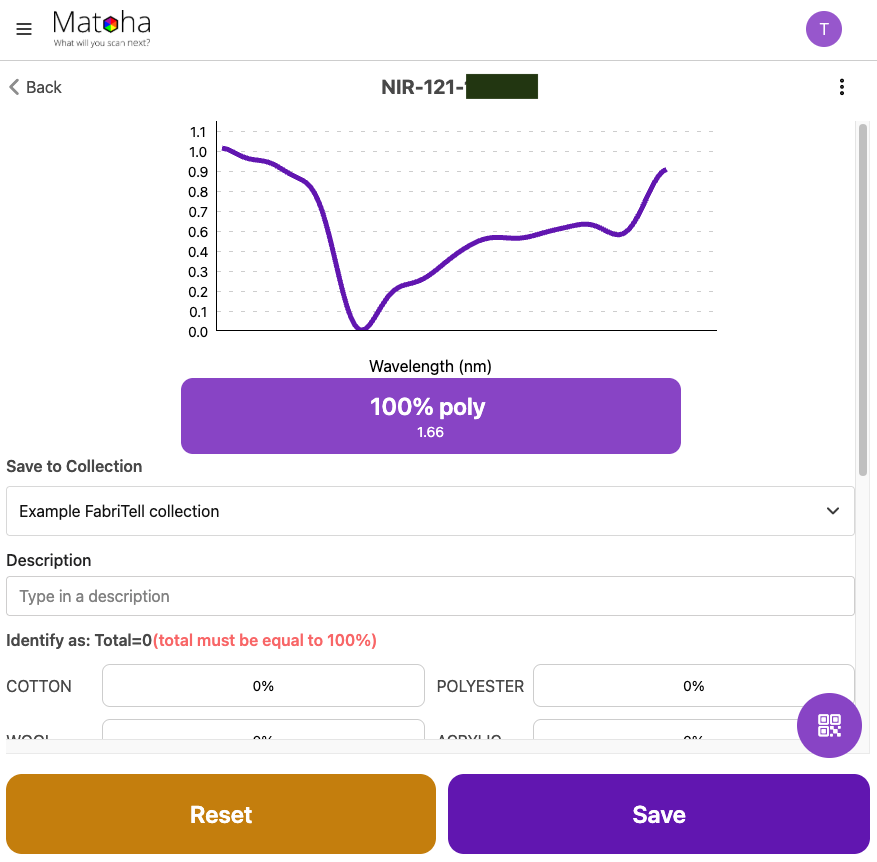
1. Select your collection (or create a new collection).
2. Measure your sample, the result of your measurement will appear on your device screen and your spectrometer screen. 3. Enter any other relevant information about the sample, such as the material or description. (See below for an explanation on all the different descriptor types). | 1. Select your collection (or create a new collection).
2. Measure your sample, the result of your measurement will appear on your device screen and your spectrometer screen.
3. Enter any other relevant information about the sample, such as the material or description. (See below for an explanation on all the different descriptor types).
4. Save your measurement by clicking on the purple "Save" button. |
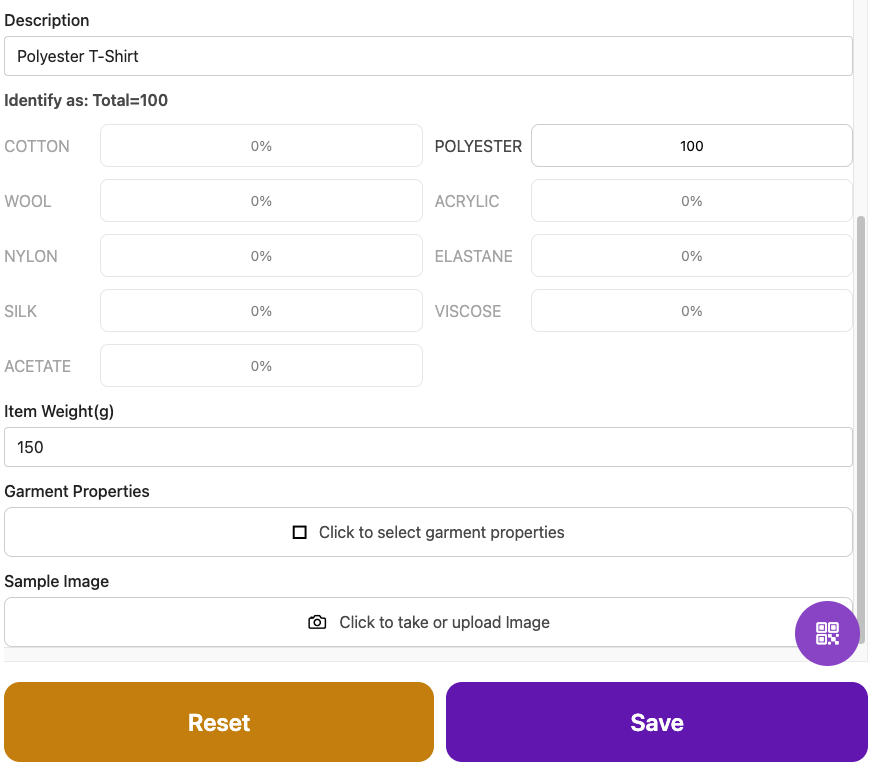
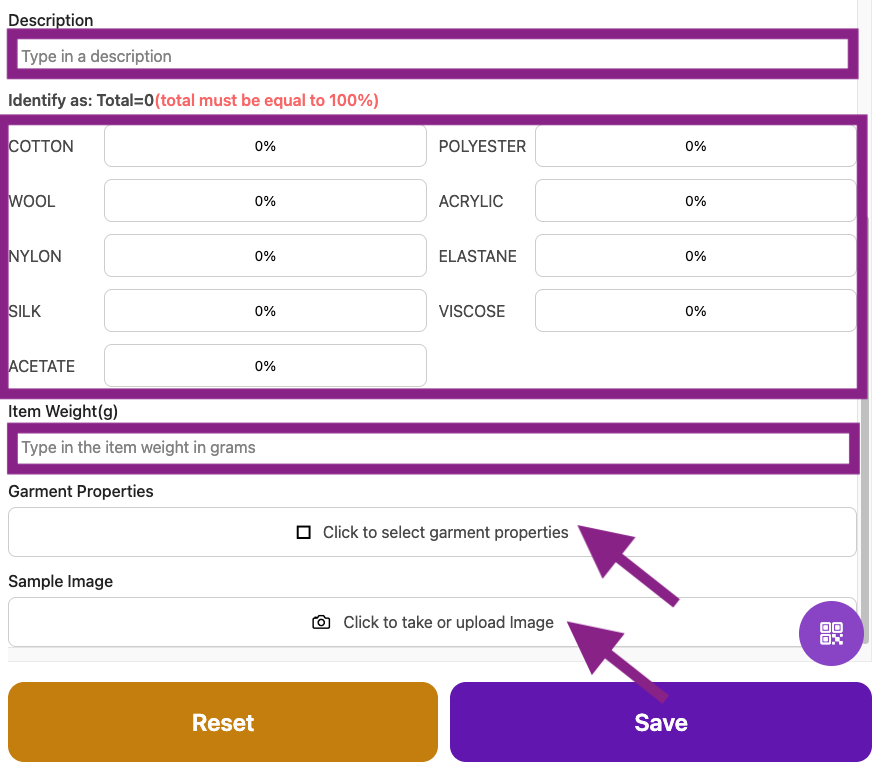
For FabriTell collections, you can add further information on the items scanned:
- Description: Add a short text description of the scanned sample.
- Percentage composition: Enter the item’s composition (e.g. from the clothing label) as percentages. The app will only allow saving if the total equals 100%.
- Photo: Take and store a photo of the sample with the measurement by tapping the photo icon. The app may request permission to access your device’s camera.
- Weight: If known, you can record the weight of the item.
- Garment details: Additional details can be added by selecting Add properties (explained in the next section).
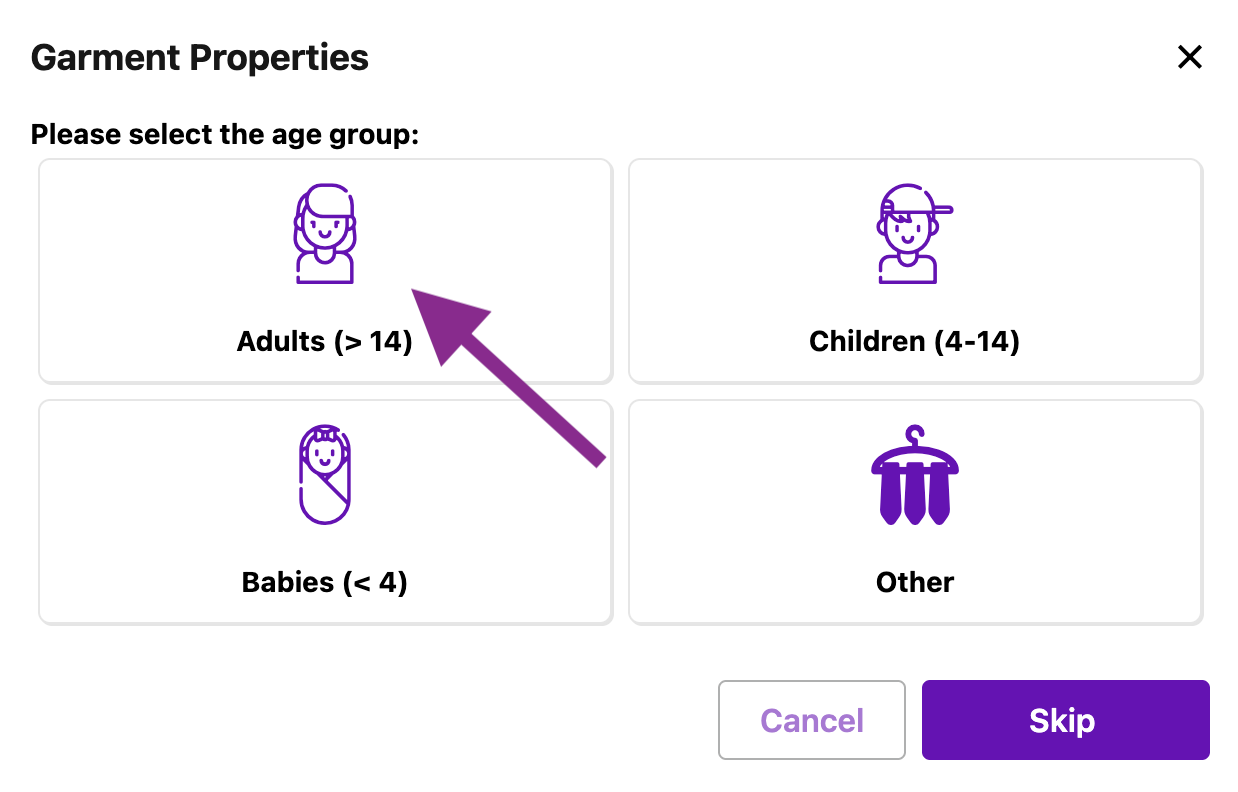
As an example, if we have a women's red T-shirt:
Select the "Adults (>14)" icon
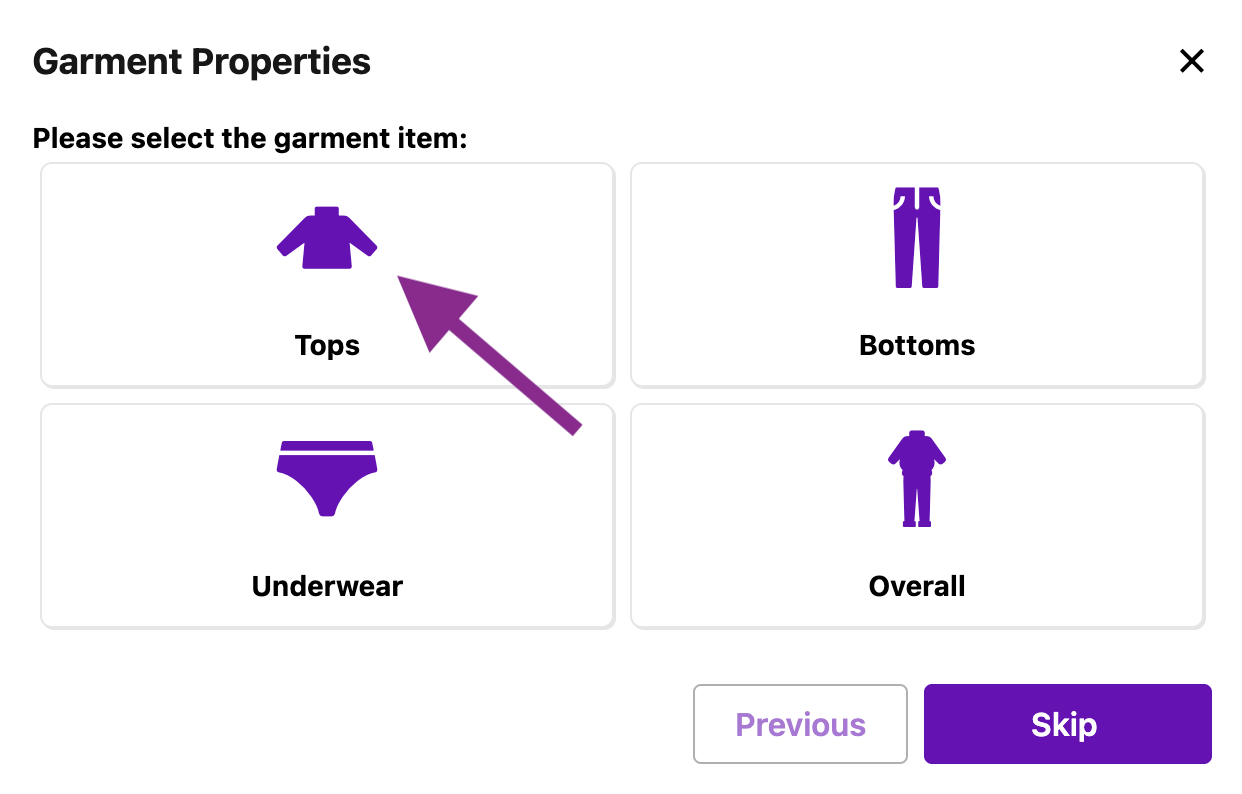
Select the "Tops" icon
Select the "T-shirt" icon
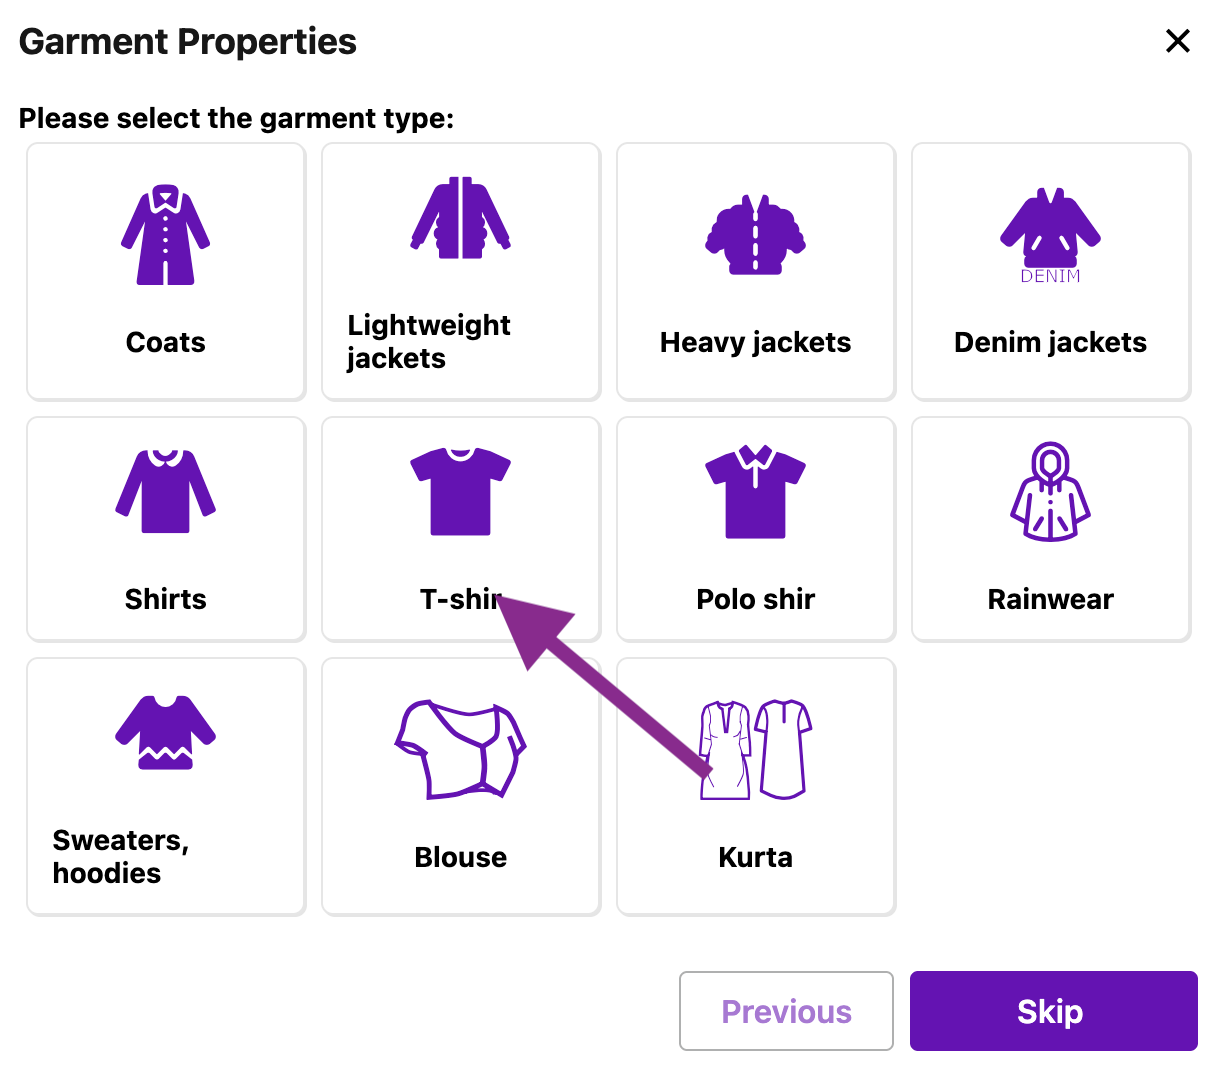
Select the colour which is closest to your garment colour (for this example, red)
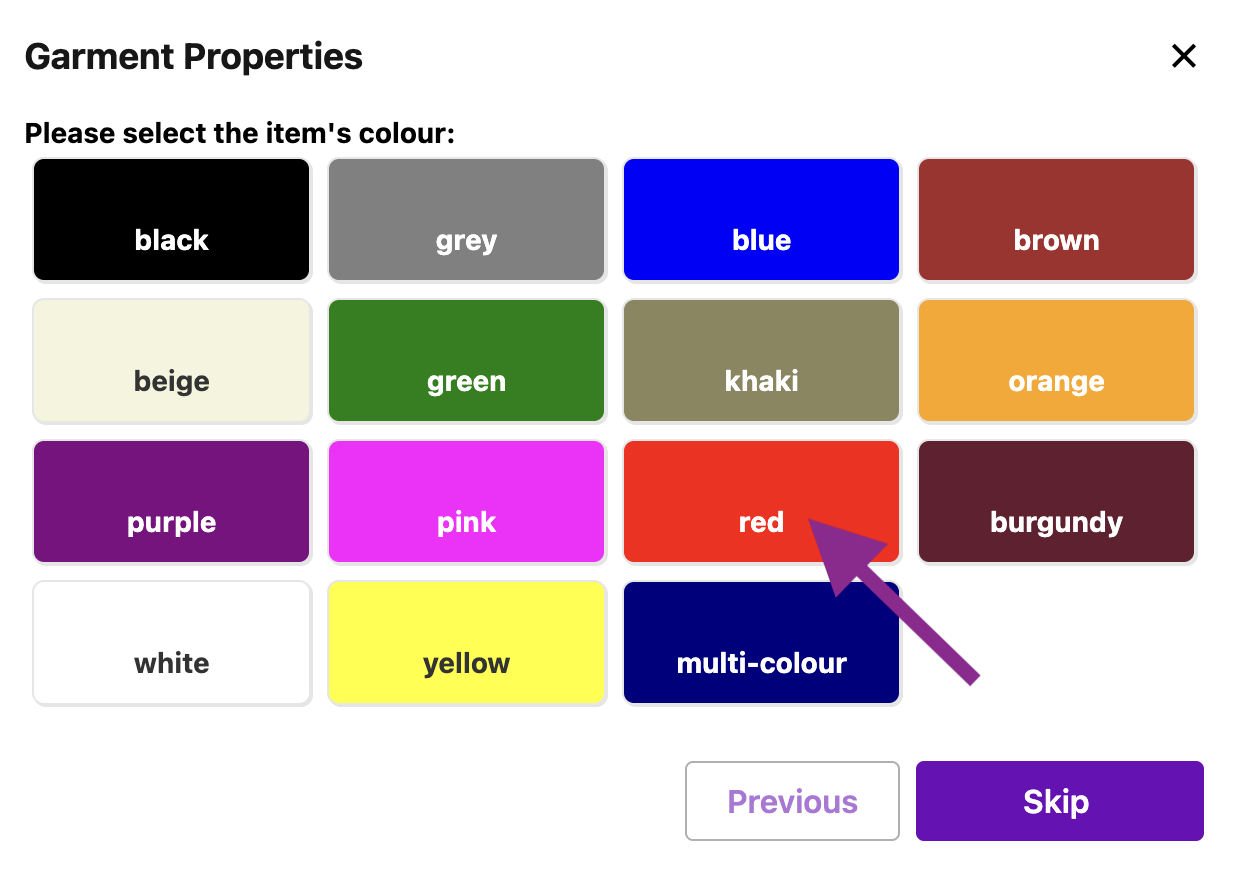
Check if there are any disruptors present - these would be non-fabric items present on your garment such as buttons or zippers. You can select several disruptor types if required.
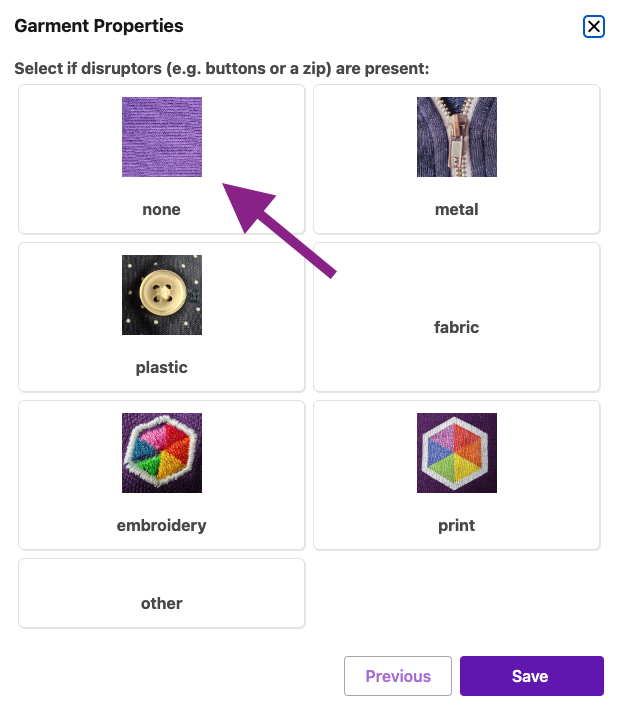
Once you input all of these descriptors, you will be taken back to the screen showing your measurement spectrum and any other data you have inputted. To save your measurement with all the descriptors, select "Save".

Saving menu
We have added a few settings to make the saving of data more convenient - these are available from the "Measurement settings". To bring it up, click on the three vertical dots on the right hand side and select "Measurement Settings":
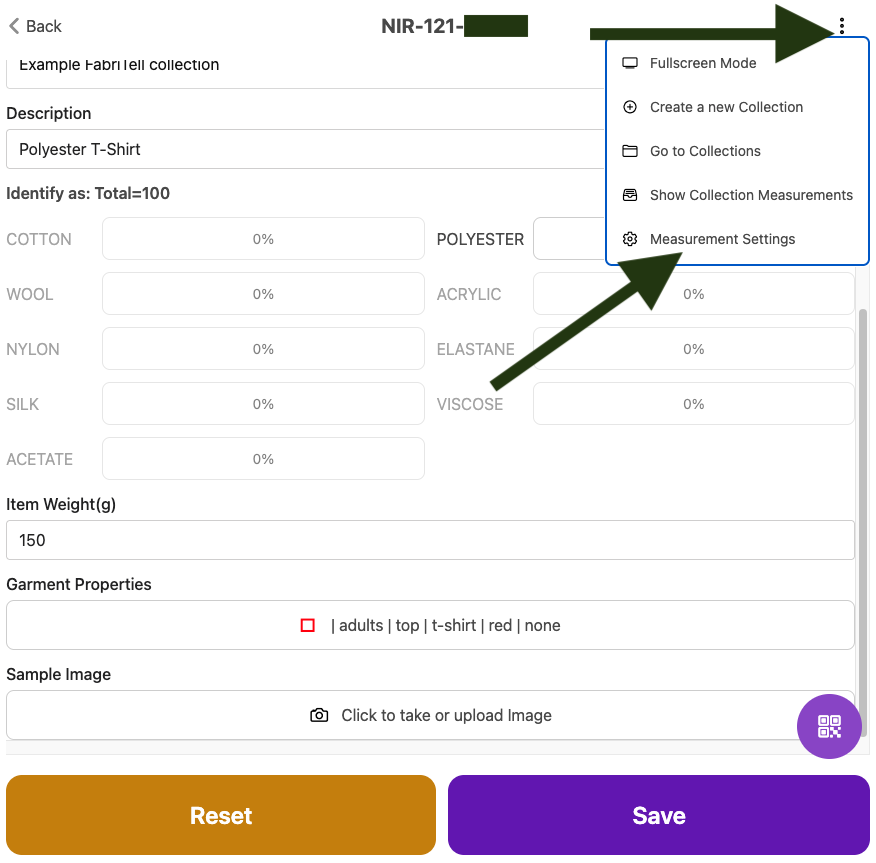
This will open a new pop-up with the following options to 'turn on' or 'turn off':
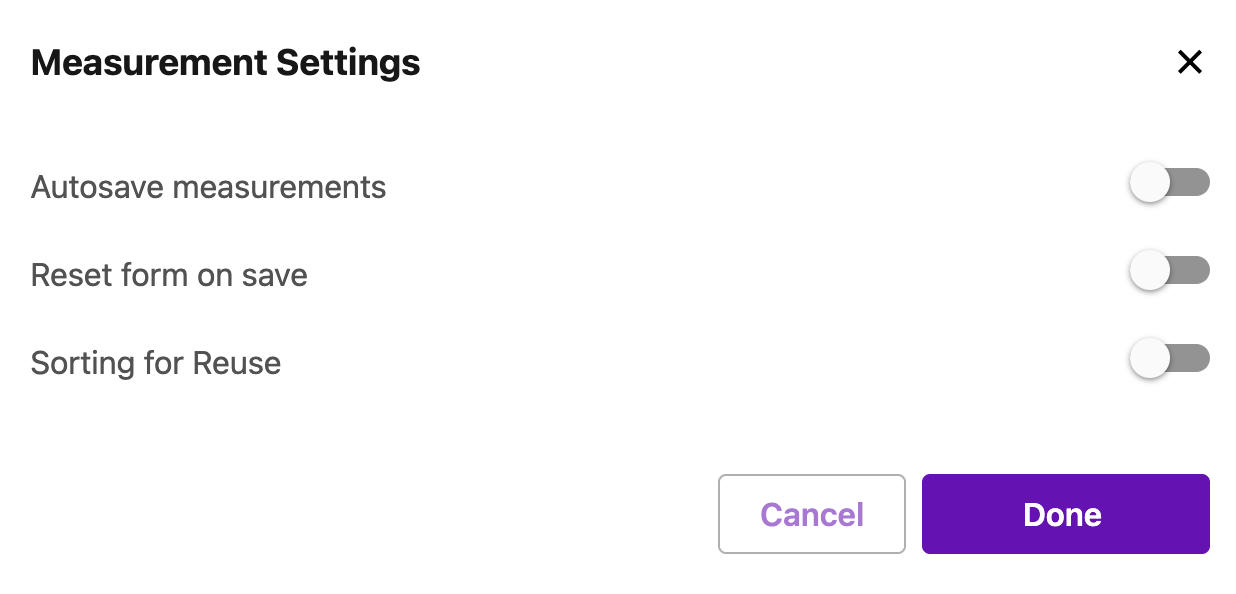
- Autosave measurements: to automatically save any data you inputted together with the device identification. Any manual data inputs will remain entered after the device answer has been recorded and will be saved again with new measurements.
- Reset form on save: to automatically save any data you inputted together with the device identification. Any manual data inputs will be cleared upon saving the measurement.
Sorting for Reuse: to record additional information on the garment, including:
- Garment structure: knitted or woven
- Moisture: moist or dry
- Reuse grade: Grades 1-5