Unpacking your Instrument
If the video does not start, please use this link.
What is in my box?
Thank you very much for your purchase! We ship each instrument in a protective carry case, as shown in the photo below.
- Your spectrometer (FabriTell or PlasTell)
- A power supply
- Adapters for your power supply for UK, EU and US mains power sockets
- A quick reference guide which contains the basics of how to use your instrument
- A calibration target
Your desktop device
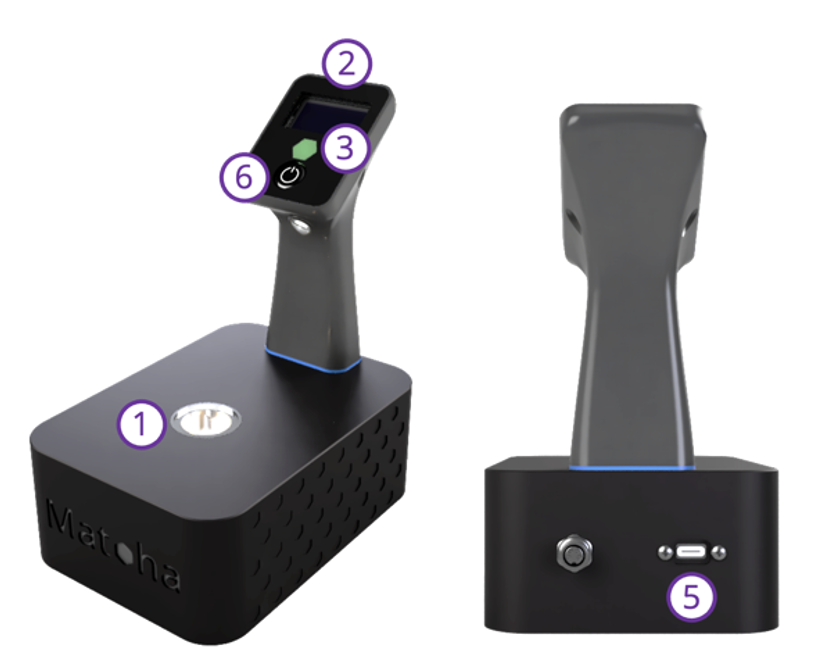
① Infrared Light Source & Detector
Place the material you want to identify here.
② Display Screen
The measuring result for the material will display here. Discover the meaning of the symbols on page 7.
③ Programmable Colour LEDs
Select a designated colour for a particular material for easy sorting.
⑤ Power Inlet
USB-C power connector, 5V DC, 2.5 A in. Use only the supplied USB-C adapter ⑧.
⑥ Control Button
Your handheld device


① Infrared Light Source & Detector
Place the material you want to identify here.
② Display Screen
The measuring result for the material will display here. Discover the meaning of the symbols on page 7.
③ Programmable Colour LEDs
Select a designated colour for a particular material for easy sorting.
④ Reflective Target (Handheld PlasTell)
Used to help with measuring transparent samples, by placing it behind the sample.
⑤ Power Inlet
USB-C power connector, 5V DC, 2.5 A in. Use only the supplied USB-C adapter ⑧.
⑥ Control Button
Press and hold to turn on device. Once turned on, hold to open the menu then shortly press to switch between options then hold the button again to confirm.
⑧ Power Supply with Adapters
Change the power plugs included to match your country.
⑨ Calibration Target
Material with a well-defined infrared spectrum, supplied with each machine. See the Calibration section for more information.
⑩ Battery Hatch
Use a coin to open the hatch to replace the built-in battery.
⑪ Trigger Button
Short press to take a measurement.
⑫ QR and Barcode Scanner
Used to scan QR and barcodes on samples or batches for traceability.
⑬ Spare Battery Cradle
Up to two batteries can be carried or charged in the battery cradle.
⑭ Holster
Holster for your belt to always have the device with you.
Your bench device
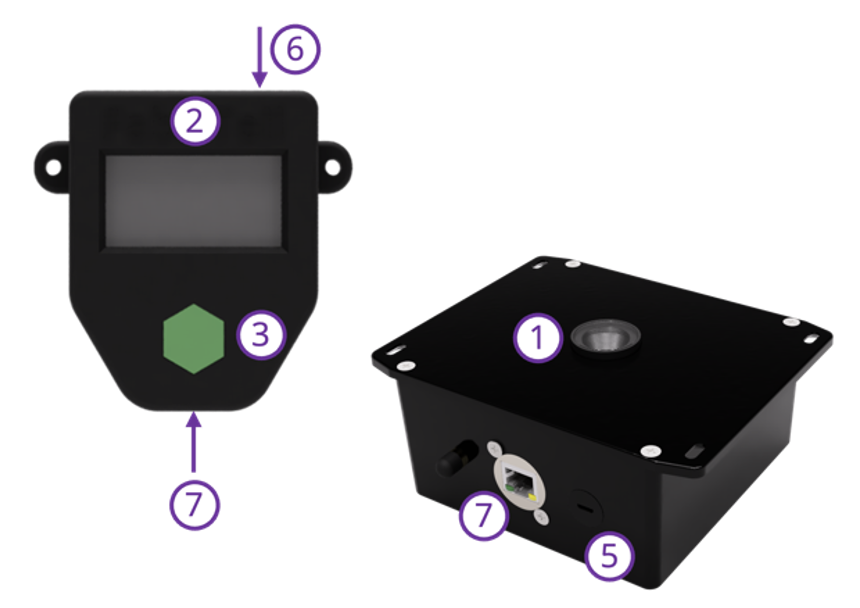
① Infrared Light Source & Detector
Place the material you want to identify here.
② Display Screen
The measuring result for the material will display here. Discover the meaning of the symbols on page 7.
③ Programmable Colour LEDs
Select a designated colour for a particular material for easy sorting.
⑤ Power Inlet
USB-C power connector, 5V DC, 2.5 A in. Use only the supplied USB-C adapter ⑧.
⑥ Control Button
Press and hold to turn on device. Once turned on, hold to open the menu then shortly press to switch between options then hold the button again to confirm.
⑦ External Screen Connector
Use the provided RJ45 cable to connect the Bench instrument to the screen.
⑧ Power Supply with Adapters
Change the power plugs included to match your country.
⑨ Calibration Target
Material with a well-defined infrared spectrum, supplied with each machine. See the Calibration section for more information.
Ready to turn the machine on?